Epoxy resin application is a reliable way to transform an old concrete surface into something durable and visually appealing. If you are a home or business owner to learn more about concrete resurfacing and transforming it into durable epoxy, then you have come to the right place.
In this guide, we will cover surface preparation, old concrete resurfacing, product selection for your new epoxy coating, and more.
Let’s get started!
Why Add an Epoxy Coat to Existing Concrete Floors?
At this point, you may be wondering whether epoxy application is truly beneficial. After all, you can just stain concrete if you want to change its appearance.
Well, the benefits extend beyond aesthetics. Although concrete is pretty durable on its own, adding a coat of epoxy resin ensures greater longevity.
Unfortunately, this material is susceptible to water damage and wear and tear over time. In areas that are constantly exposed to moisture and high foot traffic, epoxy can provide protection.
That’s because it forms a non-porous layer over the concrete, ensuring that water and other substances cannot get into it. This prevents damage and ensures a long-lasting flooring solution.
Furthermore, epoxy offers a visually appealing finish, improving the aesthetics of the surface while resisting damage. It also makes the surface easy to clean and maintain, which in turn lowers the associated costs.
Epoxy is also incredibly flexible in terms of customization. You can make it non-slip, change its colour and texture, and more. This gives you the freedom to create a driveway or pool deck that is truly tailored to your needs and preferences.
The Contractor Guide: How to Resurface Concrete with Epoxy Resin
Without further ado, let’s get into the steps involved in the application of high-quality epoxy resin to resurface old concrete.
Step 1: Inspect the Concrete Surface
Before you get started, it’s important to conduct a thorough inspection of the concrete. If there are cracks, unevenness, or pits, these issues must be addressed first before the epoxy can be applied.
It’s also important to identify any moisture issues. Concrete absorbs water, and over time, older surfaces can absorb moisture. This can affect the epoxy bond, so you will need to address the underlying issue and ensure that the area is dry enough.
To do this, you will likely need to conduct moisture testing. Failing to complete this step could result in poor adhesion, which is often seen as bubbling, peeling, or de-lamination. So, make sure that you are taking the time to check for water in the concrete.
Step 2: Choose a Suitable Product
You will need to purchase your materials and tools before you get started. Most of them can be obtained from a DIY or hardware store. Make sure that you are choosing an epoxy resin that is designed especially for old concrete.
Get any additives you’d like to add, such as colour flex or sand for texture. Don’t forget your tools and primer. Once you have acquired all the materials you need, it is time to get started on your new concrete project.
Step 3: Prepare Concrete for Epoxy Application
The next step is surface preparation. Keep in mind that skipping this step will result in even the best epoxy failing to provide the outcome you are looking for. The first step in surface preparation is cleaning.
Special products are often used to clean the surface. They are designed to get rid of grease, oil, and more that could affect the epoxy and concrete bond.
Once that has been completed, it is time to grind the concrete. The purpose of this is to remove all contaminants that could affect epoxy adhesion. It also creates an even and level surface.
Moreover, using a mechanical grinder produces a rough surface that allows the epoxy to penetrate and adhere to the concrete.
Step 4: Repair Cracks and Surface Defects Before Applying Epoxy
Once the surface has been prepared correctly, you will need to fix any cracks or pits in the concrete. To do this, you will need a sander and a high-quality patching product that is compatible with epoxy resin.
If you are not a trained concrete repair specialist, we highly recommend stopping here and getting someone with the necessary skills to take care of the repair.
While it may seem like an unnecessary expense, if you get this part of the process wrong, you will likely end up with uneven flooring.
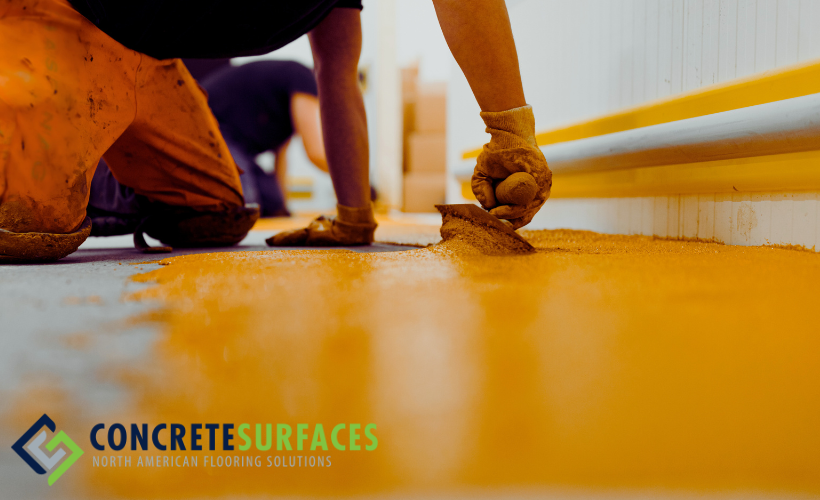
Step 5: Install the Epoxy Flooring
After taking the time to repair and prepare the concrete, it’s time for the epoxy floor installation. It’s important that you start by applying a primer to ensure that the epoxy adheres to the concrete.
Follow the manufacturer’s instructions and allow the primer to cure before applying the primary epoxy coating. When applying each layer, make sure that you are maintaining the evenness of the floor.
While one coat may be sufficient for most surfaces, additional coats may also be necessary to keep it looking good for a long time. If you are applying epoxy to an area that receives a lot of foot traffic, consider two or three coats.
Be sure to allow each layer enough time to cure before applying the next.
Looking to Outsource Your Concrete Resurfacing Project? Contact Concrete Surfaces Inc.
If you need to revamp old concrete for a client, then the good news is that you don’t have to get the job done on your own. Concrete Surfaces Inc. is here to help.
With years of experience with concrete resurfacing, and concrete polishing, you can rest assured that we are equipped to handle unleveled surfaces.
From garage floors to pool deck surfaces, we can help you tackle just about any outdoor concrete project.
Contact us today at 519.564.0902 to learn more about transforming your floors into beautiful and durable epoxy, with our concrete resurfacing methods!
Frequently Asked Questions
1. Can I use acid etching for surface preparation?
No, we do not recommend using acid etching, as it is less safe and effective than mechanical grinding or shot blasting.
2. When is it a good idea to apply a hardener to a concrete surface before applying epoxy?
If the surface you are working on is porous, soft, or prone to dusting, it’s a good idea to apply a concrete hardener before you begin with the epoxy coating. That’s because it ensures that the concrete is in good enough condition, creating a uniform surface.
3. Can epoxy resin be applied to outdoor surfaces?
Absolutely! It’s a great way to ensure that the concrete lasts longer. However, make sure that you are choosing a product that is designed specifically for outdoor application.

Devon has over 25 years of experience providing customers with high performance epoxy flooring to fit any need or budget. Referrals are our best friend and customer satisfaction is always our top priority. When Devon is not working you can find him fishing, or hunting across North America.


Share This Article
Choose Your Platform: Facebook Twitter Google Plus Linkedin